Step One
Cut a hole in a box.
But for serious, I started out by basing all of the cloth with Orkhide Shade. Ordinarily I use Snot Green, but as OS is a foundation paint, it goes over a black primer so much easier.
Step Two
Over this layer of Orkhide Shade, I put a layer of Goblin Green on everything except the recesses. You'll also notice on the cloak I left a bit more of the base coat showing through. On those large, flat surfaces, I wanted something that would add more contrast.

Step Three
As a final highlight, I used Scorpion Green. With this layer, I hit only the edges of the folds on the cloaks, the very top of the shield, and creases on the sleeves (which you can't see, because I apparently only took pictures of the cloak at this point).

Step Four
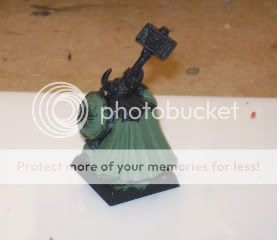
Then, I hit everything with a wash of Thrakka Green. While the contrast between the colors was decent enough before the wash, this really darkens the recesses, and blends the Goblin Green and Scorpion Green nicely, since it's a pretty big jump from one to the other. The Scorpion Green stays nice and bright, though, which is awesome.

I did make a mistake here. I tried to put too much of the cloak, which is why you can see it really pool at the bottom. I assure you that I was more cautious with the rest of my models. Anyway, after four steps, the cloak was done. That was fast. Now I just have to paint. . .the rest of the model.
Step Five
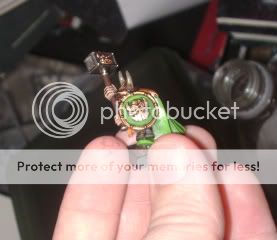
This is a relatively quick and easy step, but unfortunately it requires more brush control than before. Whereas I was using primarily the Citadel Basecoat and Standard Brushes on the cloaks and cloth, here I switched down to primarily the Standard Brush, with maybe a little work from the Detail Brush. Anyway, on all of the models, I used Boltgun Metal to coat all metals, whether they were going to be bronze or steel. Then, on the areas I wanted to paint bronze, I used a coat or two of Dwarf Bronze. Why the first step? I tend to find that Dwarf Bronze is a bit gloppy straight out of the bottle, but it also seems to have a lot of difficulty coating nicely if you water it down. Putting a metal base (and trust me, Boltgun Metal will go over anything. . .it's the best metallic paint GW produces) underneath it means I don't have to be as anal-retentive when it comes to getting a clean coat of bronze.
The skin is one or two thin layers of Tallarn Flesh, and in the interest of time, I coated both the weapon haft and the leathers with Scorched Brown (ordinarily I'd use Bestial Brown on wood). In this model's case, I used Macharius Solar Orange for the beard and hair.

Also, I almost forgot to mention -- I highlighted both the Boltgun and Bronze with Mithril Silver.
Step Six
For this, I used that miracle product. Perhaps the best product Games Workshop -- nay, any hobby supply company has ever made. Yes, I speak of. . .

I seriously love this stuff. It's amazing. If you haven't used it before, get some! Anyway, I washed the entire model, minus the cloth, with Miracle Mud. If you use it right, it won't alter the color of the paint that much, but will add a nice, shaded contrast to every recess. This is what we all fought so valiantly against the old GW Inks to get them to do. Anyway, here're some pictures after the wash.

And that's pretty much it. I still have to highlight the horns on several helmets (which were based with either Graveyard Earth or Khemri Brown, depending upon when I did it. For a highlight, which you can actually see me start to do in that last picture, I just use watered down Bleached Bone. The first coat still shows a lot of the base color through it, so you move up a little bit with the second coat, and again with the third until you have a nice step-up gradient from brown to bleached bone as you move from the base to the point.
I also have to base these bad boys, but as I glued on the sand and inked it yesterday, that'll take me all of ten minutes. Then it's matte varnish, and on to my next project -- war machines!
Oh, and if you want to see larger pictures of my work, go here.
Just a small tip i read about on another blog that helps.. is to pain the cloak with the wash upside down. Then you let them dry upside down. The reason is that the wash will collect at the top of the cloak and then wont look so heavy at the bottom, where it would not make much sense..
ReplyDeleteHmmm. . .thanks for the heads up! I'll have to try that out. And also figure out a way to hang those suckers upside down.
ReplyDeleteThe best thing I found was to run two chop sticks or pencils along the bottom of the base and balance that on top of a cup...so the model hangs down inside... if that makes any sense lol!
ReplyDelete